

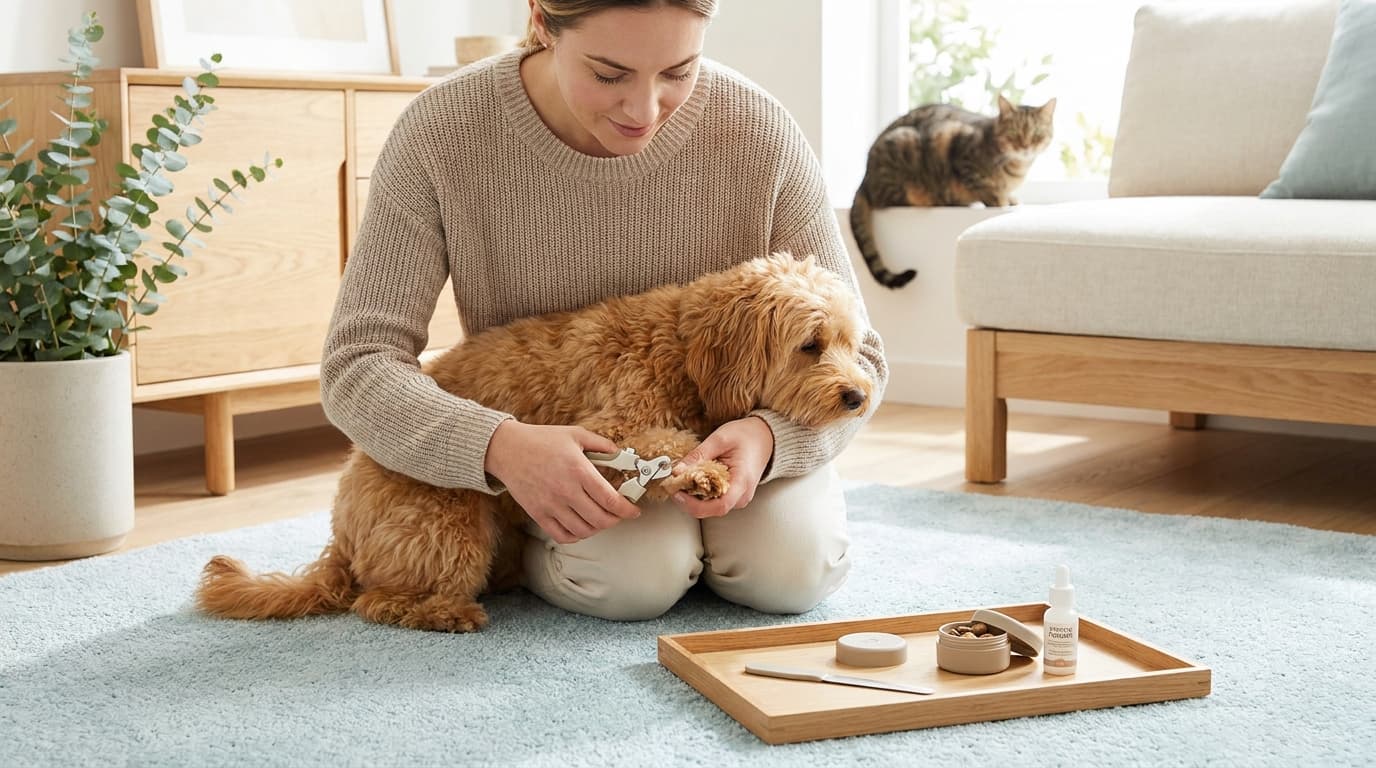
Why nail trims feel so stressful (and how to change the vibe)
If pet nail trimming makes your stomach flip, you’re in very good company. Most of the stress comes from two things: not knowing exactly what you’re looking at (that mysterious “quick” everyone talks about) and worrying you’ll break your pet’s trust in one bad moment. The good news is that nail care doesn’t have to be a dramatic event. You’re not aiming for a perfect salon finish—you’re aiming for small, safe progress that keeps paws comfortable and floors a little quieter.
A simple mindset shift helps a lot: think of nail trims like toothbrushing. It’s a skill you and your pet build together, not a one-time test you either pass or fail. That’s why the most effective dog nail clipping sessions are often the shortest ones. One nail today, two nails tomorrow, a full set next week—still a win. And if your pet is already tense, you can absolutely start with “practice trims” where nothing gets clipped at all.
Before you even pick up clippers, set yourself up for calm. Choose a time when your pet is naturally relaxed—after a walk, a play session, or a meal—so they’re more inclined to settle. Keep the space quiet and well-lit, because shadows make it harder to see what you’re doing and that increases your nerves. If you have a helper, use them for gentle support and treat delivery, not for wrestling; restraint tends to make pets panic, and panic makes everyone rush.
The tools that make pet nail trimming easier (and safer)
You can trim nails with basic gear, but the right setup makes pet nail trimming feel dramatically less intimidating. For dogs, many people like scissor-style clippers for small-to-medium nails and guillotine-style clippers for certain shapes, while others prefer a grinder for gradual smoothing. For cats, small, sharp cat-specific trimmers give you better control on tiny nails. Whatever you use, sharp matters more than fancy—dull blades squeeze and crack the nail, which feels unpleasant and makes your pet more likely to pull away next time.
Have styptic powder (or a styptic pencil) within arm’s reach—not because you’re expecting disaster, but because knowing you’re prepared lowers your anxiety. Keep a few cotton pads or tissues nearby too. A bright light helps you see the nail structure, especially if your pet has dark nails. And don’t underestimate traction: a non-slip mat or towel under your pet prevents that slow-motion sliding that makes them feel unstable and makes you grip harder than you mean to.
Treats are part of the toolkit. Not the “regular kibble you hand out sometimes,” but something your pet truly loves and only gets during grooming practice. For many dogs, soft pea-sized treats work well because you can deliver them quickly without long chewing breaks. For cats, a lickable treat can be magic—steady licking keeps them occupied and creates a calm rhythm while you handle paws.
Step-by-step: dog nail clipping without the panic
Start with a quick body-language check. If your dog’s eyes are wide, ears pinned, or they’re pulling their paw away before you even touch it, your first goal isn’t clipping—it’s comfort. Sit beside them rather than looming over them, and gently touch a paw for one second, then treat. Repeat. You’re teaching: “Paw handling predicts good things.” This tiny warm-up is often the difference between a smooth session and a wrestling match.
Now get your dog into a stable position. Many dogs do best lying on their side with their back against your legs, like you’re forming a supportive “wall.” Others prefer standing with you at their side, especially if they don’t like feeling pinned. You’ll know you’ve found the right position when their muscles feel soft and they’re not trying to twist away. If you’re doing dog nail clipping on a wiggly pup, keep sessions short and upbeat—clip one nail, treat, take a break.
Look at the nail from the side. You’ll usually see a thicker part closer to the toe and a thinner, curved tip. Aim to remove only the very end—think “tiny slice,” not “big chop.” With light-colored nails, you can often see the quick as a pinkish area inside. With dark nails, go extra slowly and stop as soon as you see a small darker circle in the center of the cut surface; that can be a sign you’re getting close. If you’re nervous, it’s completely fine to take off less than you think you need. You can always come back in a few days.
Clip at a slight angle, following the natural curve, and avoid flattening the nail with the clipper. If your dog has dewclaws (the thumb-like nails on the inner leg), don’t forget them—they don’t always wear down naturally and can become sharp little hooks. After a few nails, pause and check in: is your dog still relaxed? If yes, keep going. If not, stop on a good note, treat generously, and try again later.
One practical trick that helps a lot with pet nail trimming is “treat timing.” Treat after each nail, not after the whole paw. That frequent reward turns the process into a predictable pattern: touch, clip, treat. Predictability is calming, especially for pets who get nervous when they can’t tell what’s coming next.
If you accidentally nick the quick, don’t spiral. Stay calm, apply styptic to the nail tip with gentle pressure, and give your dog a moment. The biggest trust-breaker isn’t the nick—it’s the human panic that follows. When you keep your voice steady and your movements slow, most dogs bounce back faster than you’d expect.
Step-by-step: trimming cat nails (yes, it can be peaceful)
Cat nails are a different experience. You’re not doing “cat nails” the same way you do dog nails, because cats have retractable claws and a much lower tolerance for being restrained. The secret is to work with their natural calm moments—after they’ve eaten, while they’re sleepy, or when they’ve settled into a favorite spot. Some cats even prefer nail trims on a familiar lap, as long as you’re relaxed and not gripping them like they’re about to escape.
Start by gently massaging a paw and pressing the toe pad to extend the claw. You’ll see the translucent hook and, inside, the pink quick. You only need to remove the sharp tip—just enough to blunt the needle point that catches on blankets (and, unfortunately, skin). If your cat’s nails are darker, take even less. With cat nails, tiny trims done more often are usually easier than trying to take off a lot at once.
Keep your cat’s body supported. Many cats feel safer when their back feet are tucked under them, so you might trim front paws first while they’re loafed, then decide whether the back paws are even happening today. And that’s okay. If your cat gives you a clear “no” (tail flicking hard, ears flattening, skin twitching, growling), stop before it turns into a full protest. Ending early—before anyone is upset—builds confidence for next time.
If your cat is the type who bolts the second they see clippers, try a few days of “clipper equals treat” training. Leave the trimmers nearby during a calm hangout, give a treat, put them away. Next day, touch the trimmers to the paw (no clipping), treat, done. This kind of slow introduction feels almost too simple, but it’s one of the most reliable ways to make cat nails manageable for nervous humans.
A quick note on scratching: trimming helps reduce damage, but it doesn’t replace scratching. Cats need to scratch for normal claw care and stress relief, so keep scratchers available in the places they already like to hang out. When their environment supports natural behavior, nail trims become less urgent and less emotionally charged.
Troubleshooting the moments that derail pet nail trimming
If your pet fights the moment you touch a paw, you’re not failing—you’ve just found your starting line. Spend a week doing paw touches paired with treats, keeping it short and casual, like you’re absentmindedly checking their feet while watching a show. For dogs, you can also practice holding the paw for one second, then two seconds, then gently tapping the nail with the back of the clipper. For cats, aim for “one claw, then done” as a baseline. Consistency beats intensity every time.
If you’re worried about cutting too short, switch to a “micro-trim” approach. Clip the tiniest sliver off the tip, then stop. Repeat in a few days. Over time, many pets’ quicks can recede a bit when nails are kept shorter (this varies, so don’t bank on it), but the real win is that you’ll get comfortable reading the nail and your pet will get comfortable with the routine.
If the sound of clipping spooks your pet, try trimming in a different room with softer acoustics, or consider a grinder for dogs if the noise and vibration don’t bother them. Some pets hate grinders, some prefer them—there’s no universal answer. The “best” tool is the one your pet tolerates and you can use calmly.
And if you’re still stuck, it’s completely reasonable to ask a groomer or veterinary team to show you a technique with your specific pet. A quick demo can clear up little details—how to hold the paw without twisting the wrist, where to place the clipper blade, how to angle for thick nails—that are hard to learn from diagrams alone. You’re still doing the important part: building a low-stress routine at home.
The funny thing about pet nail trimming is that it gets easier right around the time you stop trying to “get it all done.” Make it small. Make it predictable. Keep the treats flowing. Then one day you’ll realize you just finished a calm round of dog nail clipping or cat nails without that familiar knot in your stomach—and your pet barely noticed.